

About XMP (Extreme Memory Profile)
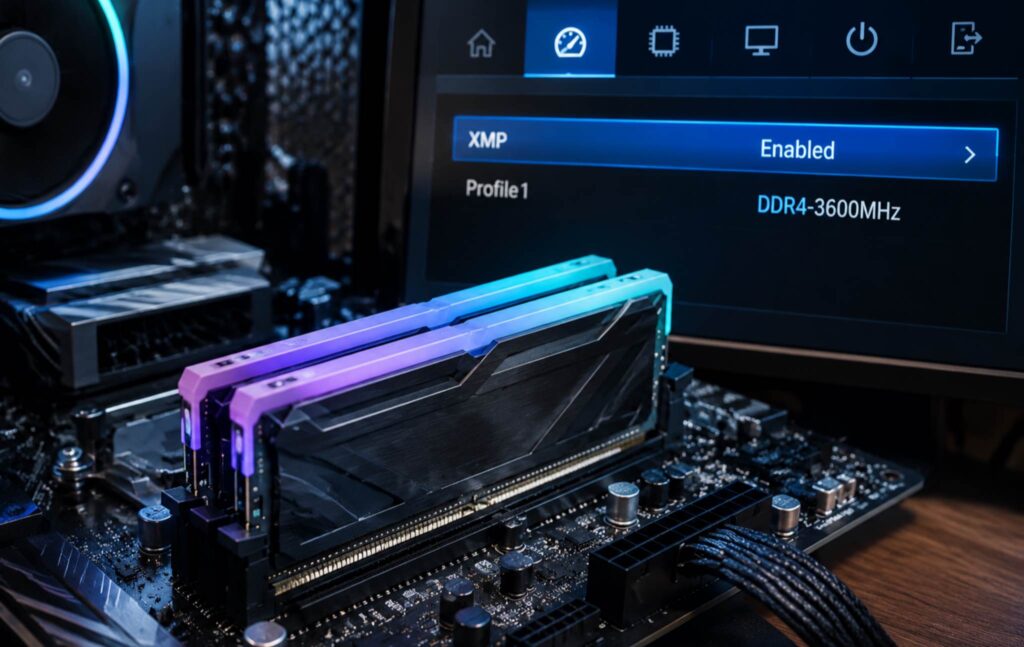
XMP (Extreme Memory Profile) is a technology developed by Intel that allows users to automatically apply higher-performance settings to their RAM with a single option in the BIOS or UEFI.
Think of it as a pre-tested “turbo mode” for your memory. RAM manufacturers store factory-verified overclocking profiles directly on the memory sticks. When you enable XMP, your PC loads those optimized settings: higher clock speeds, lower latency timings, and correct voltages, instantly.
Without XMP, most RAM runs at slow, fail-safe defaults.
RAM comes with two types of speed settings:
JEDEC – These are standard baseline speeds defined by the industry (e.g., 2133 MHz or 2666 MHz). These speeds are guaranteed to work on any system.
XMP profiles – These are higher, manufacturer-rated speeds like 3200 MHz, 3600 MHz, 4000 MHz, etc. These settings are safe but require BIOS support to run correctly.
XMP support depends on:
- Motherboard BIOS
- CPU memory controller
- RAM modules
How to enable XMP in your PC’s BIOS/UEFI?
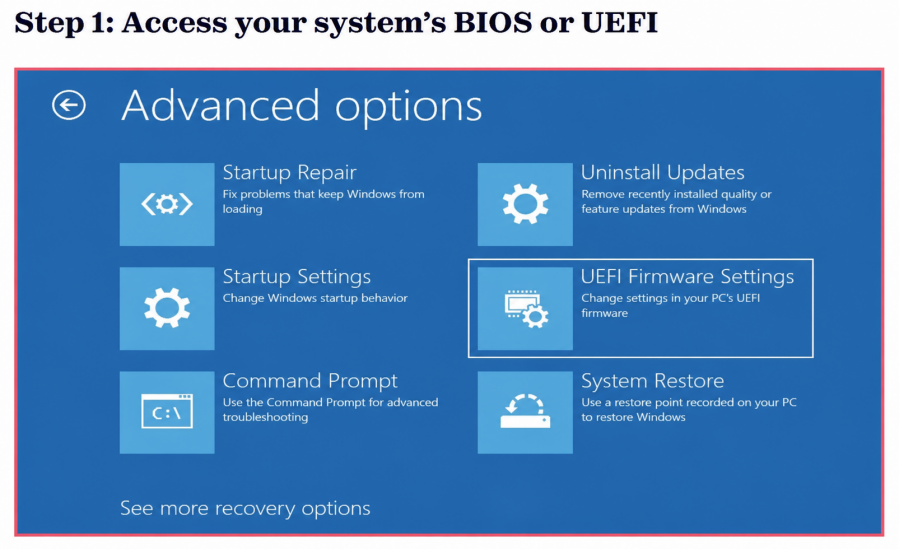
- Restart your PC.
- As soon as the system begins to boot, press the BIOS key repeatedly. Standard keys include: Delete (Del), F2, F10, or Esc.
- Your system will enter the BIOS/UEFI interface, which is where all motherboard-level settings are adjusted.
Note: If you see the Windows login screen, you missed the timing, just restart and try again.
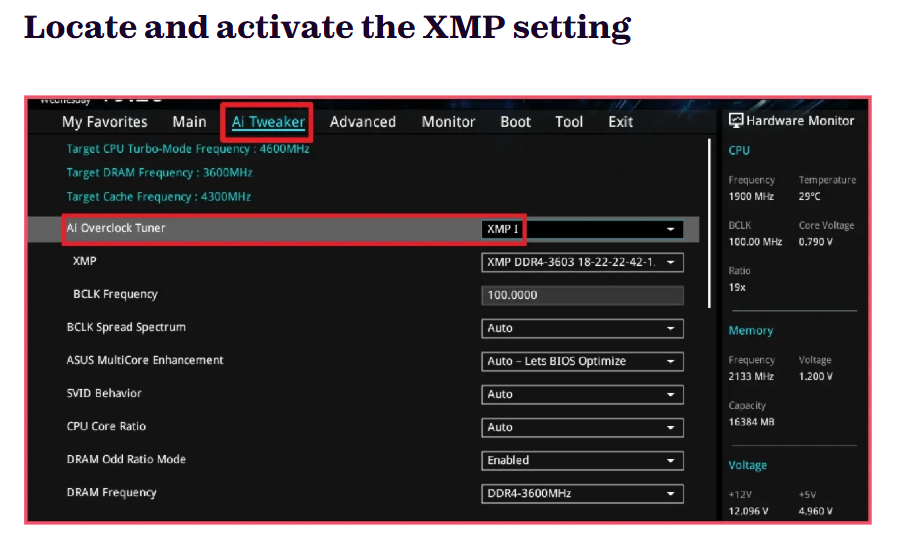
Every motherboard brand places the XMP option in slightly different menus. Look for sections labelled:
- AI Tweaker (ASUS)
- Extreme Tweaker (ASUS higher-end boards)
- OC Tweaker (ASRock)
- Tweaker (Gigabyte)
- OC (MSI)
- Advanced Memory Settings / Overclocking Settings
Inside these menus, you will see the XMP option listed as:
- XMP
- XMP 1 / XMP 2 (multiple profiles)
- A-XMP (MSI’s version for AMD boards)
- DOCP (ASUS AMD boards)
- EXPO (AMD’s official memory profile format)
Simply switch XMP from “Disabled” to “Enabled” or select the profile that matches your RAM’s rated speed (for example: 3200 MHz, 3600 MHz, etc.).
Step 3: Save your settings and restart
After enabling XMP:
1.Press F10 or choose Save & Exit from the BIOS menu.
2.Your PC will reboot, sometimes more than once. This is normal; the motherboard is training memory settings to ensure stability.
When Windows loads, your system should now be using the correct high-speed RAM profile.
What are the benefits of enabling XMP?
- Turning on XMP is one of the easiest ways to boost your PC’s performance without extra hardware. It instantly applies optimized memory settings so your RAM operates at the speed it was designed for.
- XMP allows your RAM to run at its full advertised speed instead of the slower default JEDEC speed, ensuring you get the performance you paid for.
- It provides a simple, one-click method to apply optimized overclocking settings without needing manual tuning or advanced BIOS knowledge.
- XMP profiles are pre-tested and validated by the RAM manufacturer, which makes them a safe and reliable way to boost memory performance.
- Enabling XMP can improve overall system responsiveness, especially during multitasking or running memory-intensive applications.
- Many modern games benefit from faster RAM, leading to smoother frame rates, reduced stuttering, and better minimum FPS performance.
- Video editing, 3D rendering, and other content-creation tasks see noticeable gains due to increased memory bandwidth and lower latency.
- IT workloads such as virtualization, code compilation, and database operations can perform more efficiently with higher-speed memory profiles.
- XMP can help reduce bottlenecks in systems with high-performance CPUs or GPUs, allowing them to operate closer to their maximum potential.
- The process of enabling XMP is reversible and low risk, making it an easy performance upgrade for most users.
- Using XMP helps maintain system stability because the settings are configured to match the exact capability of your specific RAM kit.
What are some key considerations before using XMP?
Before enabling XMP, it’s important to understand how it affects your hardware and system stability. While it’s generally safe, a few factors should be reviewed to ensure the best experience.
- Make sure your motherboard supports memory overclocking because many entry-level or OEM systems lock out XMP functionality.
- Verify that your CPU’s memory controller can handle the RAM’s XMP speed, as some processors have stricter limits on supported frequencies.
- Check that your RAM modules include valid XMP profiles, since standard JEDEC-only memory cannot be overclocked automatically.
- Review your motherboard’s QVL (Qualified Vendor List) to confirm that your specific RAM kit has been tested for compatibility.
- Be aware that enabling XMP slightly increases memory voltage, which may cause instability on older or lower-quality hardware.
- Understand that not all systems will boot successfully with XMP enabled, especially when using high-frequency kits above 3600 MHz.
- Know that mixing different RAM brands or speeds can make XMP profiles fail or force the system to downclock all modules.
- Keep in mind that enabling XMP is still a form of overclocking and may occasionally cause crashes, reboots, or blue screens.
- Consider running a POST or memory stability test after enabling XMP to ensure your system can handle the applied profile.
- Remember that BIOS updates can improve memory compatibility, so updating firmware may resolve issues when XMP fails to load.